Looking to make that first sale on your online store but not sure how? Google Ads could be your answer. Here’s how.
Using Google Ads could be one of the best decisions you’ll take for your online business. Here’s why.
People use Google to search 3.5 billion times a day. Each search offers a chance for you to get your business in front of more people.
This means more people visiting your store has a high chance of more sales if you show your ads to the right people.
Google Ads allows you to advertise and promote your products and services when users search for similar products like yours.
Let’s take a look at what Google Ads are, how they work, and how you can make your first sale with Google Ads.
What is Google Ads?
Google Ads is a paid online advertising platform offered by Google.
When people search for information on Google, it shows the results related to what people are looking for. This also includes paid results which are also called Ads (seen first on top of page). These ads are placed by businesses who want to promote their products online to people based on the search. Every time a user clicks on one of the paid ads, Google charges the business.
Businesses can use different ad formats when advertising on Google. There are search ads, display ads, and shopping ads.
Search ads appear at the top of Google searches. Search ads are helpful because they appear when people are already searching for products like yours using keywords.
For example, if people are searching for “buy black shoes” on Google, buy black shoes is a keyword.
By using search ads, you make sure that the right people are seeing your ads.
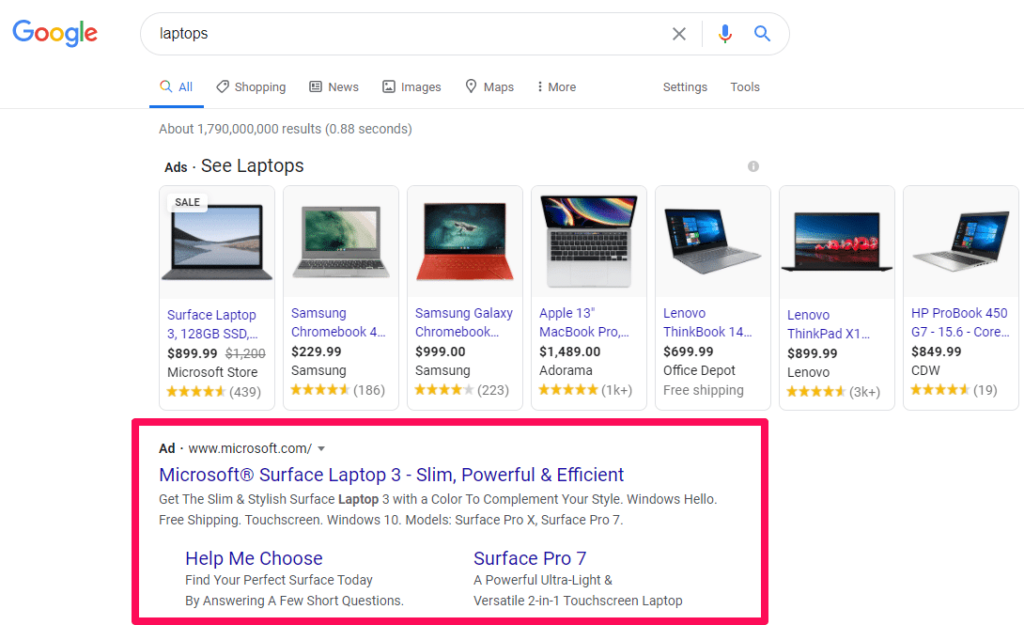
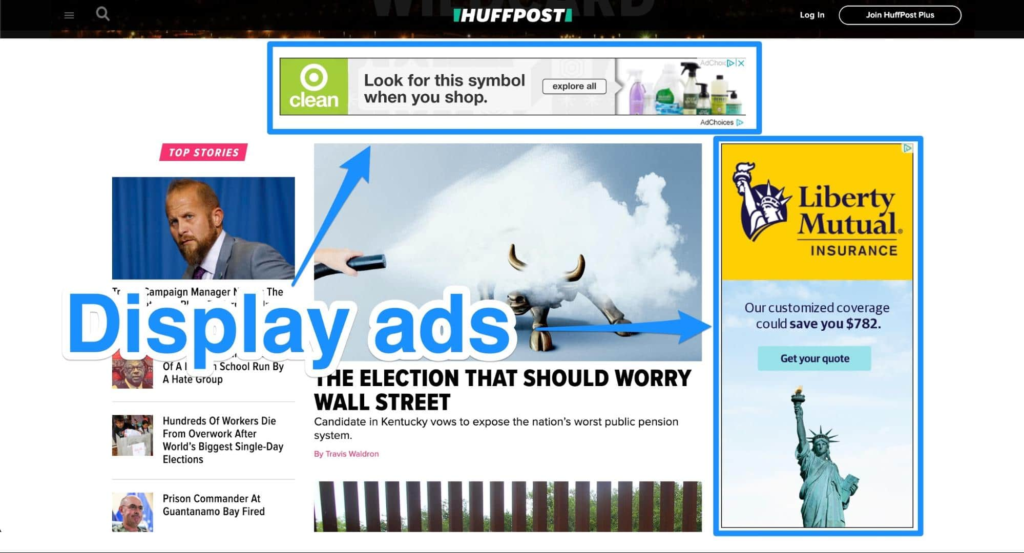
Display ads as the name suggests are visual ads. They allow businesses to use designs or banners to show their products to people. It is a good medium to catch customer’s attention.
Shopping ads allow you to promote products on the top of search results. These ads appear as images on the search results page with the price of the product mentioned.

Now that you have the basics of the types of ads available on Google, the next part is to start with a step-by-step guide on how you can use Google ads to bring visitors to your store and get more sales.
Step 1 – Create Google Ads Account
First, you need to create a Google ads account. If you already have a Google account, you can use this to sign-up for Google ads. Once done, you can manage all of your advertisements from this account.
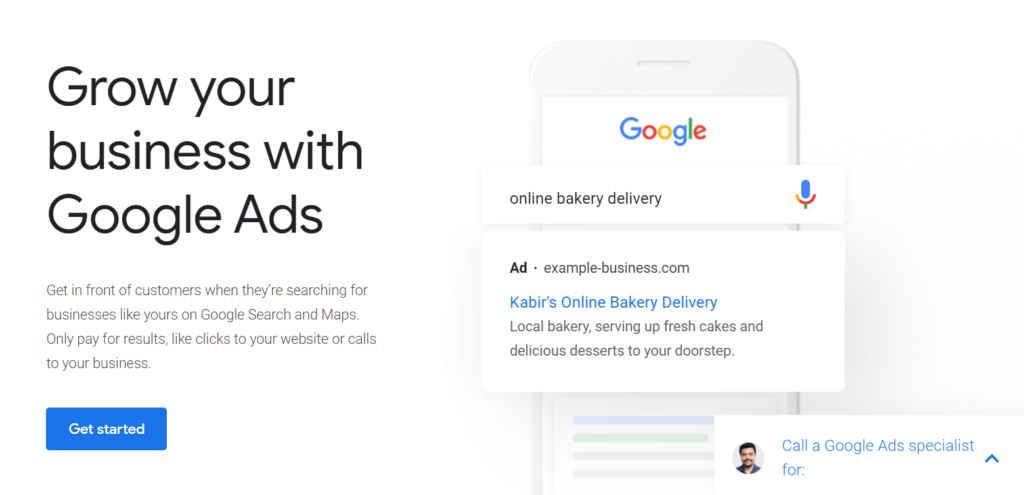
Once you click on Get started, you’ll see the below screen. To create a new account click on New Google Ads Account.

Click on Switch to Expert Mode at the bottom to set up the account as per your business requirements.

Click on Create an account without a campaign at the bottom left.
The next step is to submit your business information. Click on Submit to continue. Once you click on Submit, your account will be created.

Step 2 – Link Google Ads and Google Analytics Accounts
It’s good to use the same Google account for your Analytics and Ads accounts. By connecting these two accounts, Google will share data between them easily that can help you see what ads getting more visitors and sales.
To link your Google Analytics account to Google Ads, log in to your Google Analytics account. Click on the Admin at the bottom left.
You’ll see the below screen. Under the Property section, click on Google Ads Linking to connect with it.
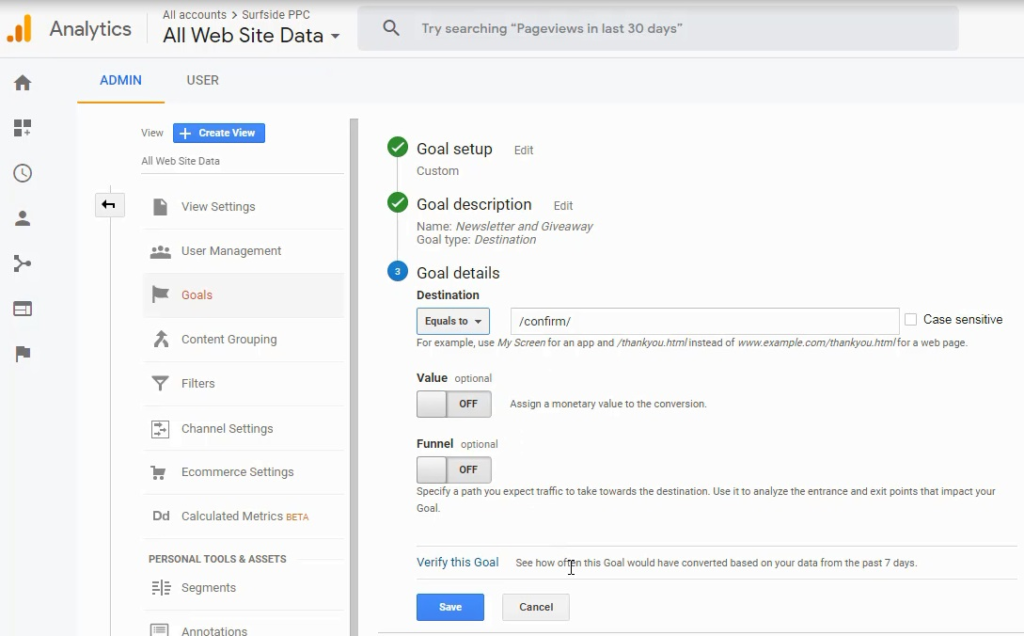
Now select the Google Ads account and confirm it. Once you do it, your Google Analytics and Google Ads account will be linked.
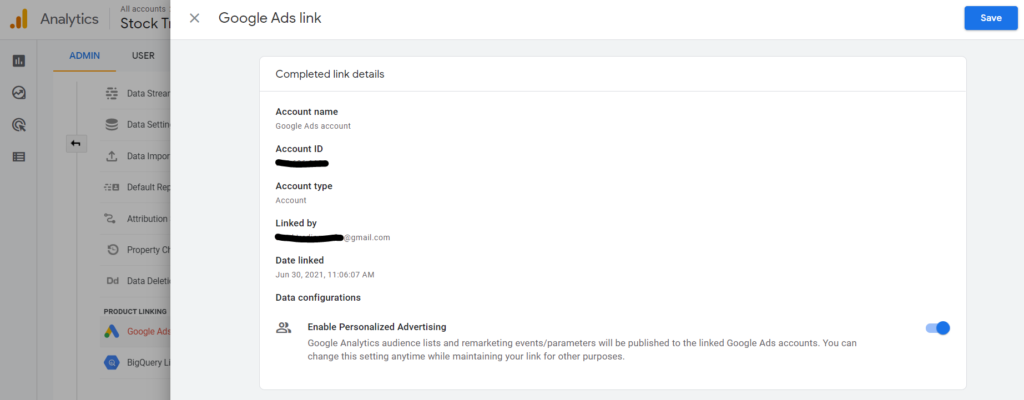
Step 3 – Set Up Google Ads Conversion Tracking
Conversion Tracking helps Google know what ads are bringing sales. This can later help you to make changes to ads that are not performing and learn from successful ads.
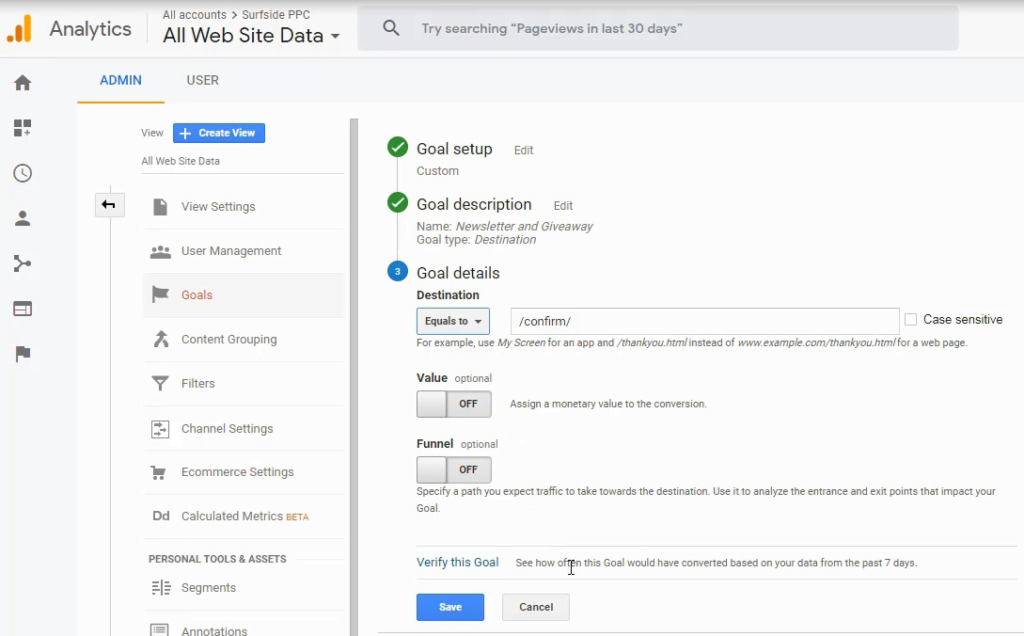
To set up conversion tracking, you need to Create Goals in Google Analytics.
Goals in simple terms are the things that you want your customers to do on your website. For example, if you want sales, your Goal would be a Purchase goal.
Go to the Admin section, as shown in the previous steps. Under the View section, click on Goals.
From there, you can create a new Goal that will be tracked in your Google Analytics account.
Suggested Reading:
Now go back to Google Ads, click on the Tools menu, and click on the Conversions under the Measurement section.

The next step is to import conversion goals into Google Ads. Click on the plus-sign (+) from the main Conversions screen.
Click on Import and choose to Import conversions from Google Analytics.

Choose the conversion goals you want to import and click on Import and Continue to finish.

Step 4 – Create a Campaign
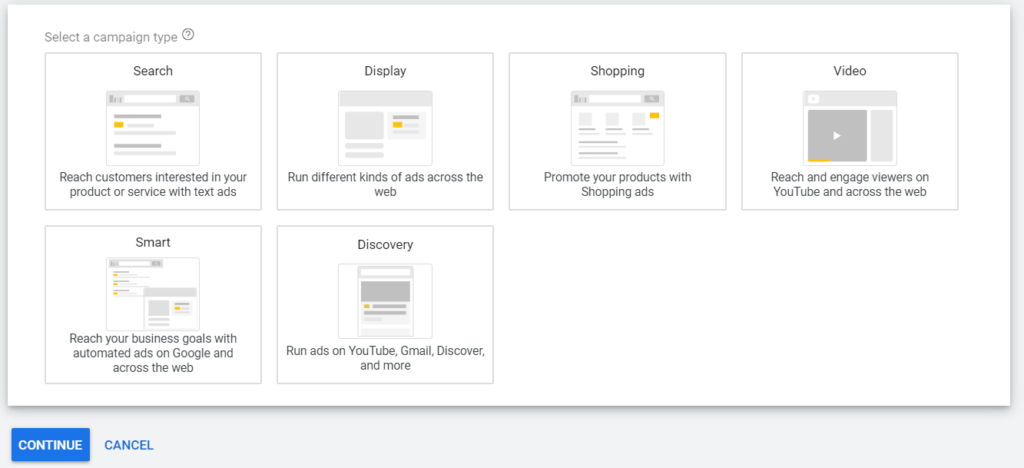
To create a new campaign, click on the New Campaign button. When you create a new campaign, you can choose the campaign type and objective.
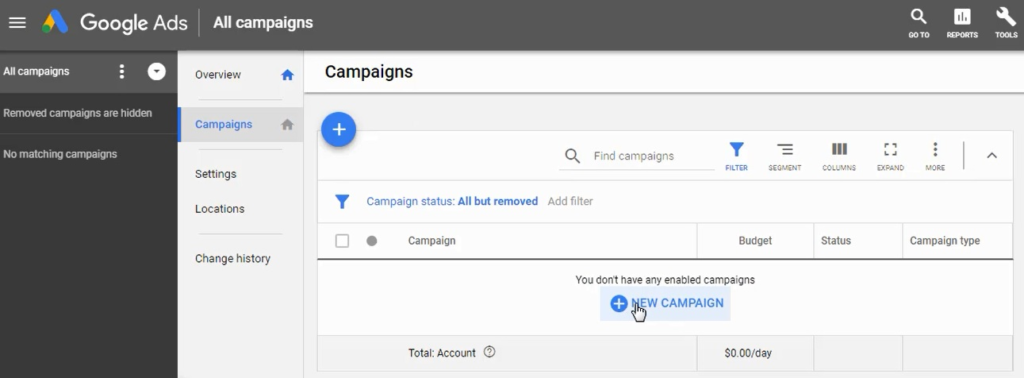
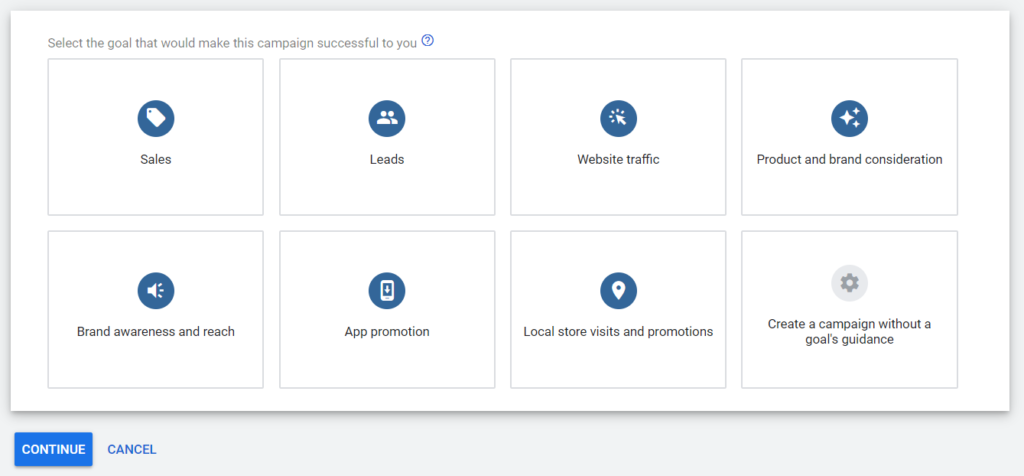
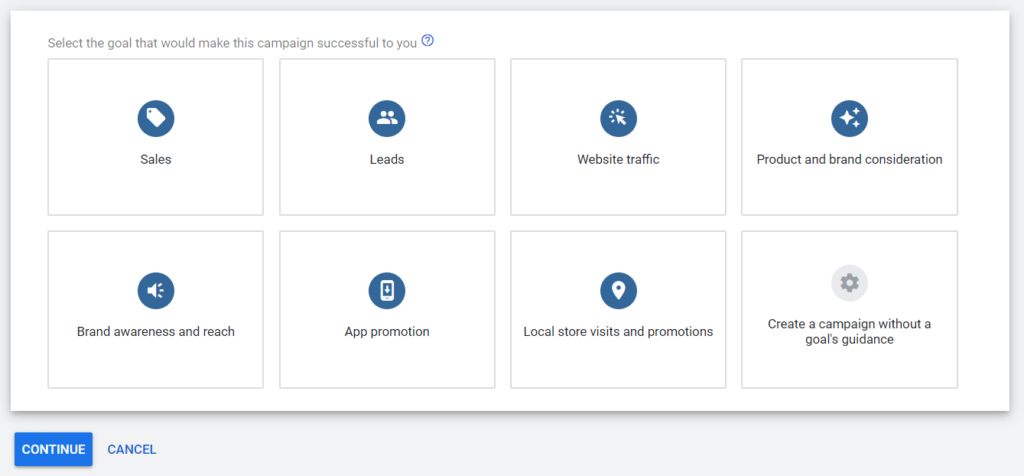
The next step is to choose the campaign’s objective. The objective is an end goal that you want to achieve with Google ads. For example, if you want sales, you should select Sales as an objective from the options below.
Here our goal is to get sales, let’s select Sales as an objective.
Now, choose the Search to create our first search campaign. As explained before, search ads show your ads above the search results to people looking to buy products similar to yours.
Step 5 – Choose Google Network and Targeting
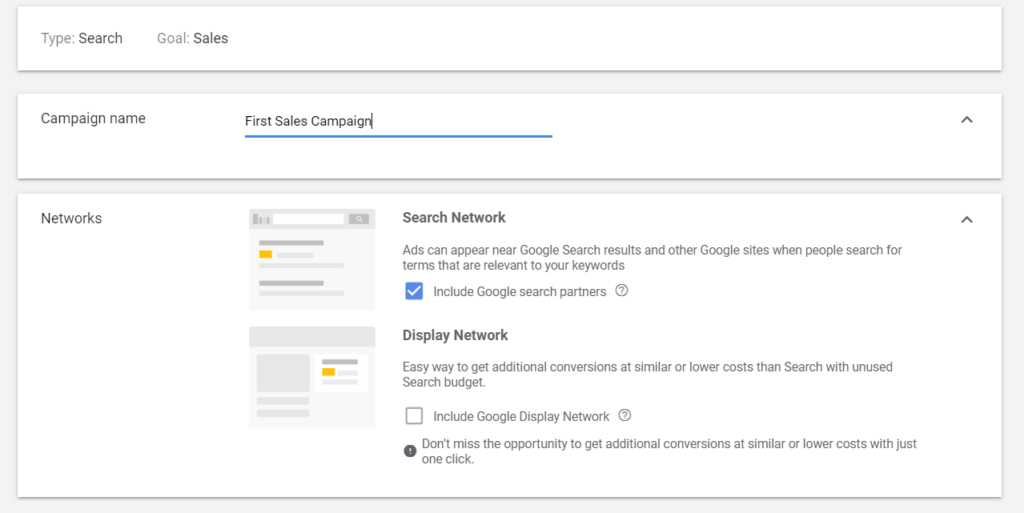
The first step here is to give a name to your campaign. Once you’ve given a name, you have to choose where you want to show your ads. Google calls it Network and it has two networks i.e. Search and Display.
For search campaigns, you should only target the Search Network and Search Partners.
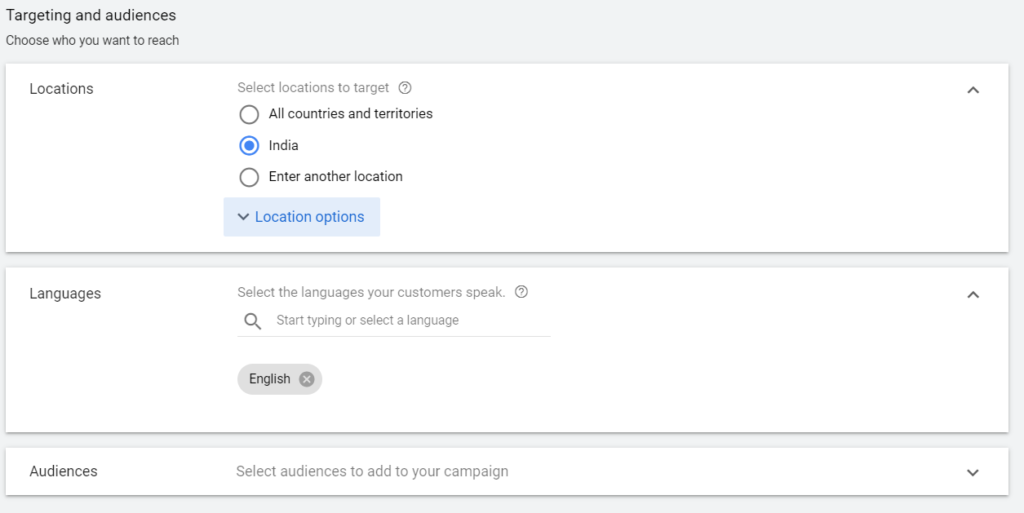
Now under targeting, you can choose location and language.
In locations, select India if you want to show your ads to people searching on Google from anywhere in India.
If you want to advertise in a particular state or city, enter the name of the location.
You can also show your ads to people based on the language they use on their browser, for example, English, Hindi, or regional language. It’s better to keep the language to English only.
Step 6 – Set Budget and Bid Strategy
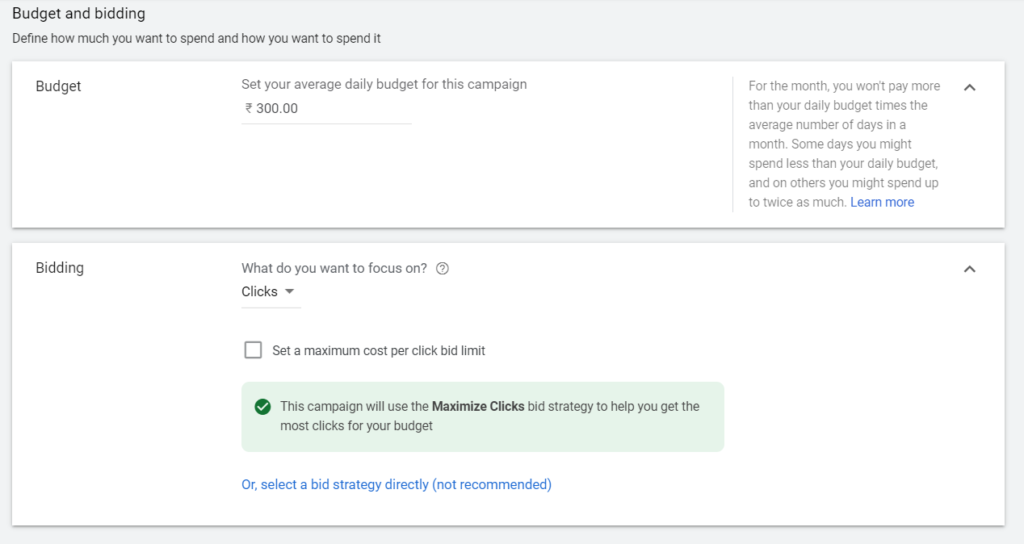
Now it’s time to set a daily budget for advertising. Budget is the amount that you want to spend in a day on Google ads. It’s good to start with a small amount before increasing the budget.
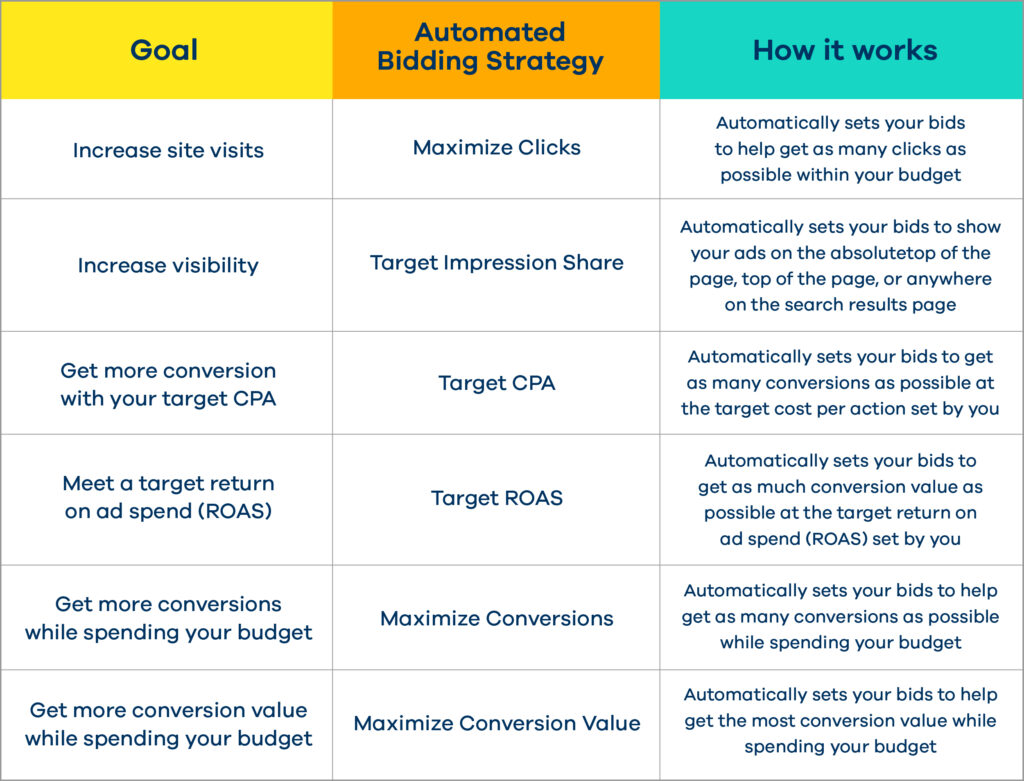
Another important part is to choose the Bidding strategy. It allows you to specify how you want to spend your budget on ads. For example, if you want people to click on your ads so that they can visit your website, you should choose Clicks bidding.
Let’s select Clicks as a bidding strategy here.
Step 7 – Set Up Ad Groups and Keywords
The next step is to name your ad group. An ad group is simply a group that contains all your relevant keywords for which you want to show your ads.
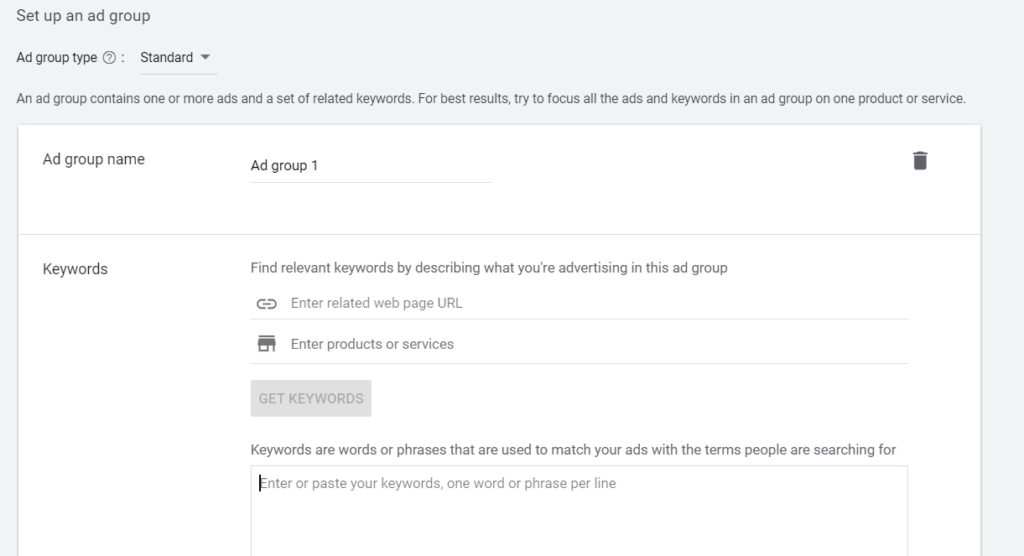
Tip: Do not run all your ads from one ad group. Differentiate and have multiple ad groups.
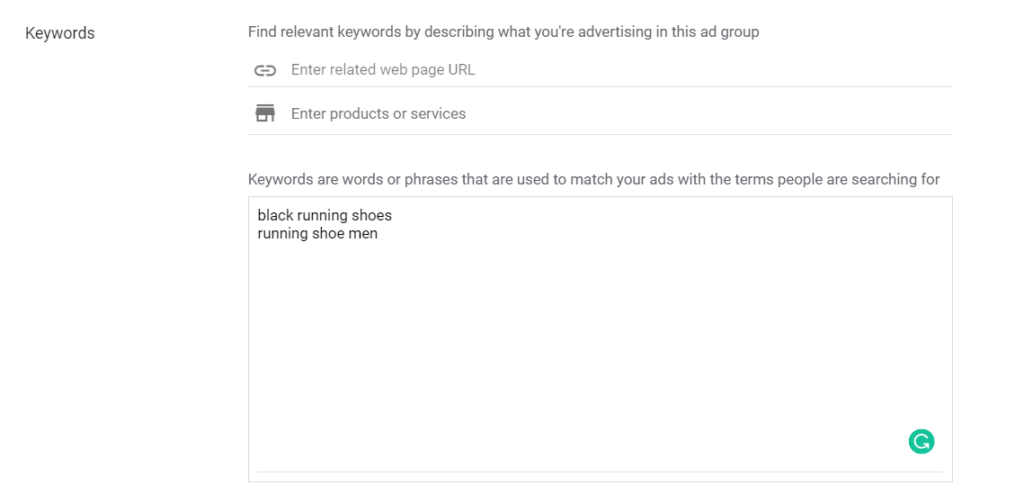
Let’s begin adding keywords to the ad group based on the products you’re selling. Keywords are the terms that people use on Google to search anything be it products, services, or information.
For example, if you are selling black running shoes, you can add keywords that people use while searching for the same. Here, we have added two keywords – black running shoes and running shoe men. Now, our ads will show whenever people are using these keywords on Google.
Step 8 – Create Ads, Set Headlines, and Set Final URLs
In this section, you have to add details like headlines, descriptions, and your website link. This will create an ad that will be shown to people on Google.
To start, enter your store link in the URL section.
Now add headlines to tell people what this ad is about and what are you selling. It’s advisable to add up to 3 headlines in ads.
After headlines, add a description to the ad. The description is used to share extra details about your products or offers. It’s advisable to add at least 2 descriptions.
While you’re adding these details, you can see how your ad will look on Google on the right side.
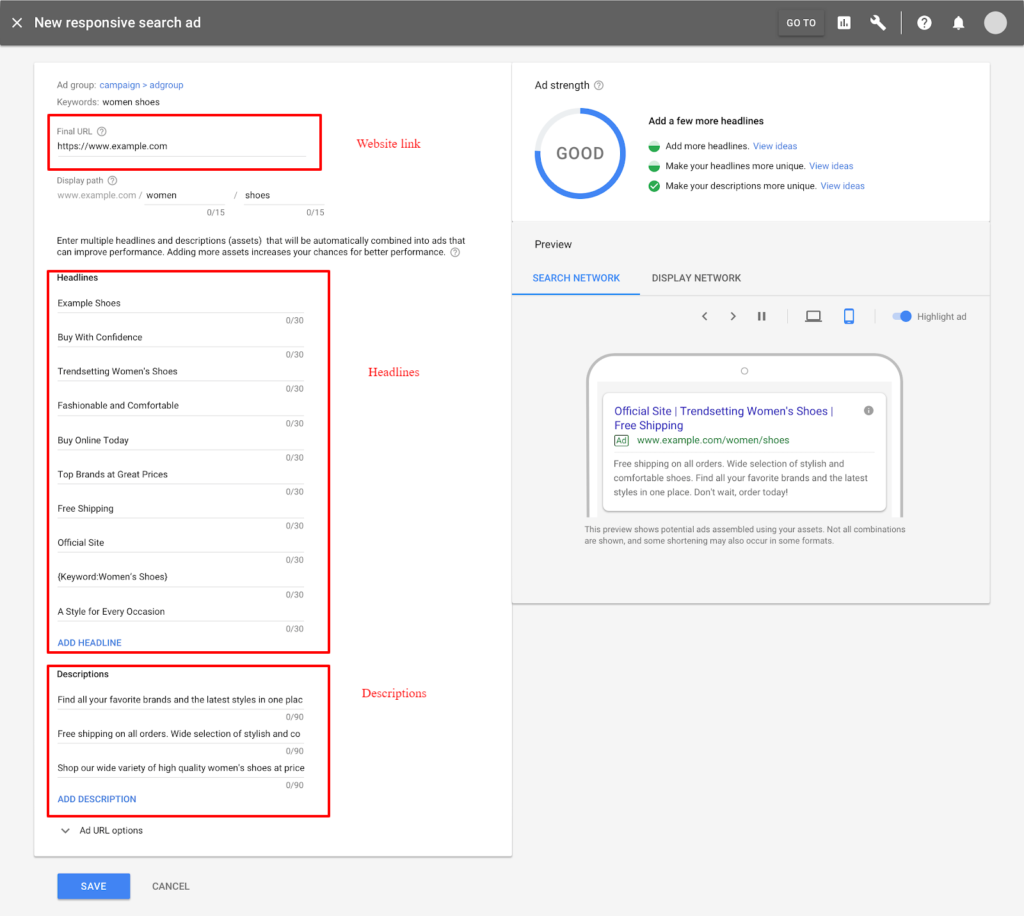
Once you’ve added all the details, click on Save and Continue to launch your campaign.
Step 9 – Measure Success
Congratulations on successfully launching your first campaign to get sales. Keep this in mind, our objective to get sales is not yet completed.
It’s time to see the performance of the ads. You need to review your results, for example, how many people are clicking on your ads, what is the cost of each click, how many people have bought the products, etc. For a new campaign, plan to review and make changes to ads every other day.
Once your campaign is performing well, you can check once a week to make sure performance is on track.
Conclusion
Running a Google AdWords campaign can grow your store fast and can bring in sales if done right. You don’t need to spend a lot to get sales. There are ways to limit your spend and ensure that you work within the budget.
But, it also takes effort and time to see promising results. Keep making changes based on what is working and test new ads to get the best results.
It’s advisable to test new headlines, descriptions, ad types, and budgets to see what is getting you good results. Once you’re comfortable with results, you can increase your budget and scale your business with Google Ads.


Leave a Reply
You must be logged in to post a comment.